

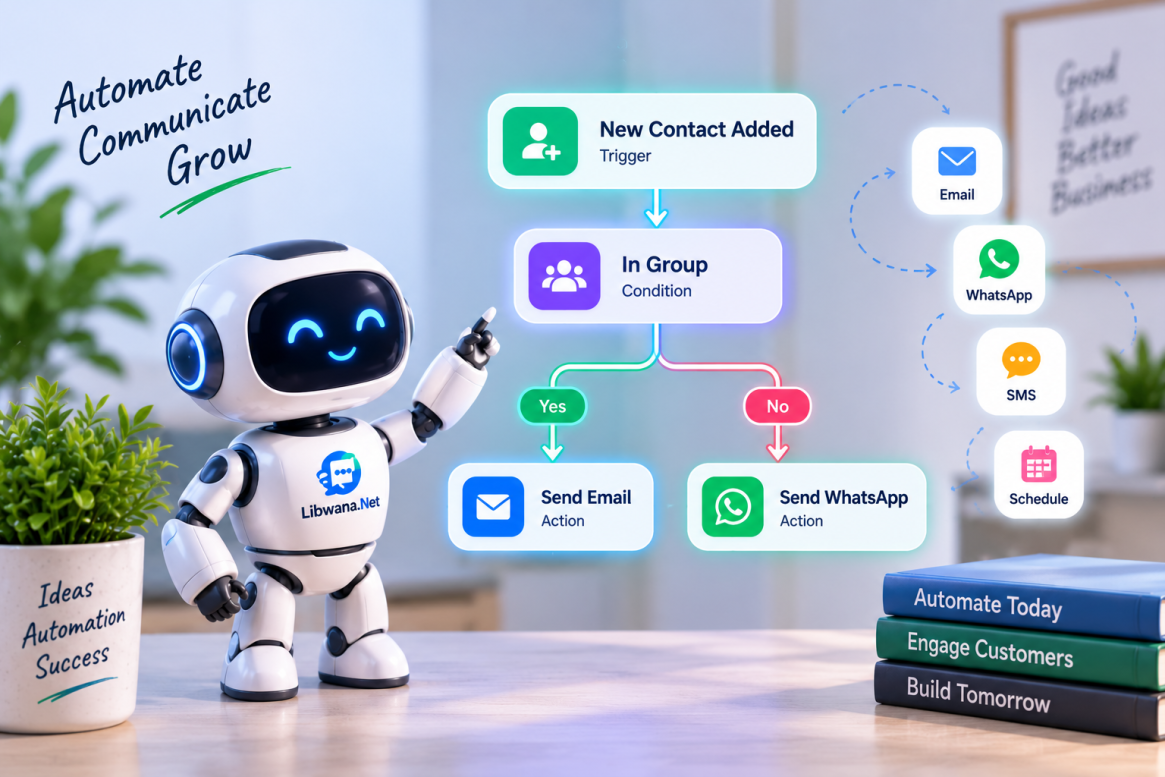
Automate Customer Communication with Visual Workflows on Libwana.net
Managing customer communication manually becomes difficult as your contact list grows. Sending welcome messages, following up with customers, responding to conversations, remembering birthdays, and running scheduled campaigns can require significant time when every action has to be performed manually.
Libwana.net simplifies these processes with its Automation Workflows feature.
Using a visual drag-and-drop workflow builder, users can create automated communication flows by connecting Triggers, Conditions, and Actions. This makes it possible to automatically send SMS, Email, WhatsApp messages, and perform other supported actions when specific events occur.
For example, you can create a workflow that automatically sends a welcome email whenever a new contact is added to a particular contact group.
Access Automation Workflows
Navigate to:
Automation → All Workflows
The Automation Workflows dashboard provides an overview of your existing workflows.
From here, you can see information such as:
Total Workflows, Active Workflows, Total Executions, and Completed Executions.
Each workflow also displays its trigger, number of nodes, execution count, and current status.
You can manage existing workflows or click Create Workflow to build a new automation.
Create a New Automation Workflow
Navigate to:
Automation → Create Workflow
Enter a Workflow Name and begin building the workflow using the visual canvas.
Instead of writing code, you can drag the required nodes onto the canvas and connect them in the order in which actions should happen.
A workflow generally follows a structure such as:
Trigger → Condition → Action → Additional Actions
For example:
New Contact Added → In Group → Send Email
This workflow can automatically send an email when a new contact is added and meets the selected group condition.
Choose When Your Automation Should Start
Every automation needs a trigger. The trigger tells Libwana.net when the workflow should begin.
Several trigger options are available.
New Contact Added
Use New Contact Added when you want an automation to start whenever a contact is added to a selected contact group.
When configuring this trigger, select the required Contact Group.
For example:
New Contact Added to "New Customers" → Send Welcome Email
This can be particularly useful when leads generated through Libwana.net are imported into contact groups. Instead of manually contacting every new lead, an automation can start when the contact enters the selected group.
Scheduled Time
The Scheduled Time trigger allows a workflow to run at a specific time or according to a recurring schedule.
This is useful for automations such as scheduled customer communications, regular follow-ups, reminders, and recurring marketing activities.
For example:
Scheduled Time → Send Email
or
Scheduled Time → Check Condition → Send SMS
Webhook Trigger
A Webhook Trigger allows an external API or supported external process to initiate the workflow.
This provides greater flexibility when Libwana.net needs to participate in a larger business process.
Manual Trigger
Use Manual Trigger when the workflow should only start when you manually initiate it for selected contacts.
This is useful when you want the benefits of a predefined automation without allowing it to run automatically every time.
Contact Replied
The Contact Replied trigger can start a workflow when a contact replies to a message.
This makes it possible to create automated follow-up flows based on customer conversations.
For example:
Contact Replied → Check Condition → Send Follow-up Message
This can help businesses respond faster and build automated conversation flows.
No Response
The No Response trigger can be used when a contact has not responded within the configured workflow conditions.
This can support follow-up processes where another message or action needs to occur when the customer does not reply.
Birthday/Anniversary
The Birthday/Anniversary trigger allows workflows to start based on a contact's birthday or anniversary information.
For example:
Birthday → Send Personalized Email
or
Birthday → Send SMS
This makes it easier to automate recurring customer engagement without manually checking dates.
Add Conditions to Control the Workflow
Triggers determine when an automation starts, while conditions help determine what should happen next.
One available condition is In Group.
In Group
The In Group condition checks whether the contact belongs to a selected contact group.
Configure the node by selecting the required Contact Group.
This allows you to build more targeted automation.
For example:
New Contact Added → Is Contact in LSS-Team?
The workflow can then follow different paths depending on whether the condition is true or false.
Conditions are especially useful when different groups of contacts require different communication.
Automatically Send Emails
One of the available actions is Send Email.
Add the Send Email node to your workflow and configure:
Label – Give the node a recognizable name.
Email Gateway – Select the configured email gateway that should send the message.
Subject – Enter the email subject.
Message – Enter the email content that should automatically be sent.
Once connected to the appropriate trigger or condition, the email can be sent automatically whenever a contact reaches this point in the workflow.
For example:
New Contact Added → In Group → Send Welcome Email
A business could use this to automatically welcome newly generated leads after they are imported into a particular contact group.
Automatically Send SMS and WhatsApp Messages
Automation is not limited to email.
The workflow builder also provides communication actions such as:
Send SMS
Send Email
Send WhatsApp
This allows businesses to create multi-channel automation workflows.
For example, a workflow could be designed as:
New Contact Added → Send Email → Send SMS
Or different actions could be used according to the customer's situation and the workflow logic.
The relevant gateway or sending configuration must be available for the communication channel being used.
Create Automated Replies and Follow-Ups
Automation becomes particularly useful when it is combined with customer responses.
Instead of sending only one-way messages, workflows can react to customer activity.
For example:
Send Message → Contact Replied → Send Follow-up
You can also build flows around customers who don't respond:
Send Message → No Response → Send Reminder
This allows businesses to automate parts of their customer follow-up process while maintaining consistent communication.
Configure Retry Attempts for Actions
Communication attempts may occasionally fail because of temporary gateway, network, or service-related issues.
For supported nodes such as Send Email, Libwana.net provides retry controls.
Retry Attempts
Retry Attempts determines the maximum number of times the platform should retry the node before treating it as failed.
Setting the value to 0 means no retry.
Retry Delay
Retry Delay (seconds) determines how long the workflow should wait between retry attempts.
This provides more control over temporary failures without requiring the entire workflow to be restarted manually.
Decide What Happens When an Action Fails
You can also configure the workflow's behavior when a node fails after all retry attempts have been exhausted.
Available failure-handling options include:
Continue to next node – The workflow continues with the next configured step.
Stop workflow – The workflow stops when that node fails.
Skip remaining and mark execution completed – Remaining actions are skipped and the execution is treated as completed.
This gives businesses more control over how automated processes behave when an individual action cannot be completed.
Connect Multiple Actions in One Workflow
A major advantage of the visual workflow builder is that you are not restricted to a single action.
Multiple nodes can be connected to create more advanced workflows.
For example:
New Contact Added → Check Contact Group → Send Email → Send SMS → Continue Follow-up
Another workflow could be:
Scheduled Time → Send Email → Wait for Response → Follow-up Action
The exact structure can be adapted according to the communication process you want to automate.
Save a Workflow as Draft or Activate It
After creating your workflow, Libwana.net provides options to Save Draft or Save & Activate.
Use Save Draft when the workflow is still being prepared and should not start processing contacts yet.
Select Save & Activate when the workflow is configured and ready to run.
Active workflows can then be monitored from:
Automation → All Workflows
Combine Lead Generation, Contact Groups and Automation
Automation becomes even more useful when combined with Libwana.net's Lead Generation and Contact Management features.
For example, you could generate business leads using Google Maps Lead Generation or the Website Scraper, review the results, and import suitable leads into a contact group.
A workflow associated with that group can then handle the next steps.
A complete process could look like:
Generate Leads → Review Leads → Import into Contact Group → Automation Triggered → Send Email/SMS/WhatsApp → Continue Follow-up
This reduces the amount of repetitive manual work required after generating leads.
Example: Automatically Welcome New Contacts
Suppose you have created a contact group called New Leads.
You want every newly added contact in this group to receive an introductory email automatically.
Your workflow could be:
1. New Contact Added
Select New Leads as the contact group.
↓
2. In Group
Verify that the contact belongs to the required group.
↓
3. Send Email
Select your email gateway, add the subject and create the welcome message.
↓
4. Configure Retries and Failure Handling
Choose what should happen if the email cannot be sent.
↓
5. Save & Activate
Once activated, the workflow can automatically process qualifying contacts without requiring you to manually send the same email each time.
Build Different Automations for Different Business Needs
Because workflows can combine different triggers, conditions, and actions, they can support many types of communication processes.
You can build workflows for new lead follow-ups, welcome messages, scheduled communication, birthday and anniversary messages, response-based follow-ups, no-response reminders, group-specific campaigns, email automation, SMS automation, WhatsApp automation, and externally triggered workflows.
Instead of repeatedly performing the same communication tasks, you can define the process once and allow Libwana.net to execute it according to your workflow configuration.
Turn Repetitive Communication into Automated Workflows
Libwana.net Automation connects different parts of the platform into a more efficient communication process.
The visual workflow builder allows users to decide when an automation starts, which contacts it applies to, what actions should happen, and what should happen if an action fails.
Whether you are welcoming a new lead, sending scheduled messages, following up with customers, or reacting to customer replies, automation can reduce repetitive work while keeping communication consistent.
The overall process is simple:
Choose a Trigger → Add Conditions → Add Actions → Connect the Nodes → Configure the Actions → Save & Activate → Monitor Executions
With Lead Generation, Contact Groups, Email, SMS, WhatsApp, and Automation working together, Libwana.net can support a connected workflow from finding a potential customer to communicating with them through automated processes.
Recent Blogs
 Mon, Sep 7, 2026 7:25 PM
How to Set Up an Email Gateway in Libwana.Net for Single & Bulk Email Sending
 Mon, Sep 7, 2026 7:31 PM
How to Set Up an SMS API Gateway and Send Bulk SMS